







In this article
This guide explains the HDR workflow for virtual production using Spatial capture solution.
*As of April 2026, this service is available for corporate customers with accounts. Contact us
*The screen images shown here are for illustrative purposes only and are subject to change.
HDR Workflow for Virtual Production Using S-Gamut3.Cine / S-Log3
XYN supports a consistent color-managed workflow from image capture, through 3D asset generation, to HDR display in Unreal Engine.
By capturing images in S-Gamut3.Cine / S-Log3, you can generate 3D assets that preserve the wide dynamic range and color gamut information recorded during acquisition. Generated assets can then be properly transformed into the Unreal Engine color space using XYN Spatial Renderer Plugin, enabling accurate HDR visualization.
Key Point
Use S-Gamut3.Cine / S-Log3 as the Color Profile consistently throughout the entire workflow, including image capture, 3D asset generation, and rendering in Unreal Engine.
Using different Color Profiles at different stages may result in unintended color reproduction or brightness levels.
Step 1:Capture Images with XYN Spatial Scan Navi
In XYN Spatial Scan Navi, open Virtual Production Capture Settings and change the shooting mode to S-Gamut3.Cine / S-Log3.
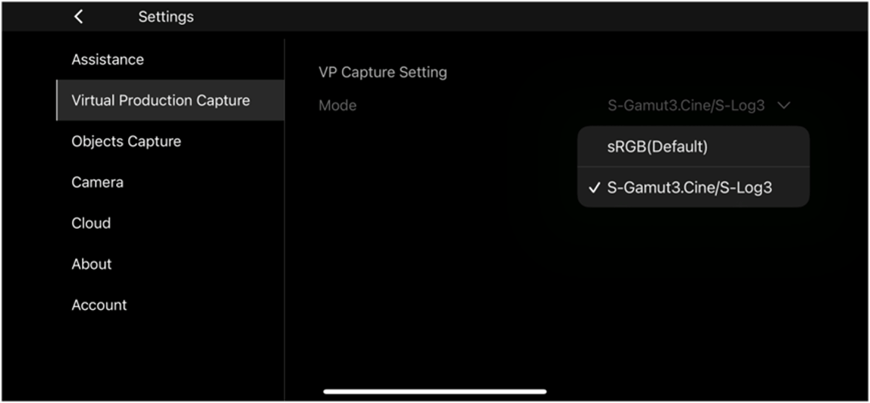
After selecting Virtual Production Mode, capture settings optimized for HDR workflows are automatically applied.
| Item | Setting |
| Picture Profile |
S-Log3 |
| Color Space |
S-Gamut3.Cine |
| File Format |
HEIF(4:2:2) |
Follow the on-screen shooting guide to capture your subject.
For details on how to use Virtual Production Mode, see the related article.
Step 2:Generate a 3D Asset in XYN Spatial Scan
Upload the captured HEIF images to XYN Spatial Scan and select Venus H as the generation algorithm.
This workflow uses Venus H, which supports S-Gamut3.Cine / S-Log3 color data.
In the Venus H settings screen, set Color Profile to S-Gamut3.Cine / S-Log3, then start the generation process.
This allows the generated 3D asset to retain the wide dynamic range and color gamut information contained in the source images.
Note: Generated PLY files retain S-Gamut3.Cine / S-Log3 color information. As a result, renderers or viewers that do not support this color space may not display the asset with the intended colors.
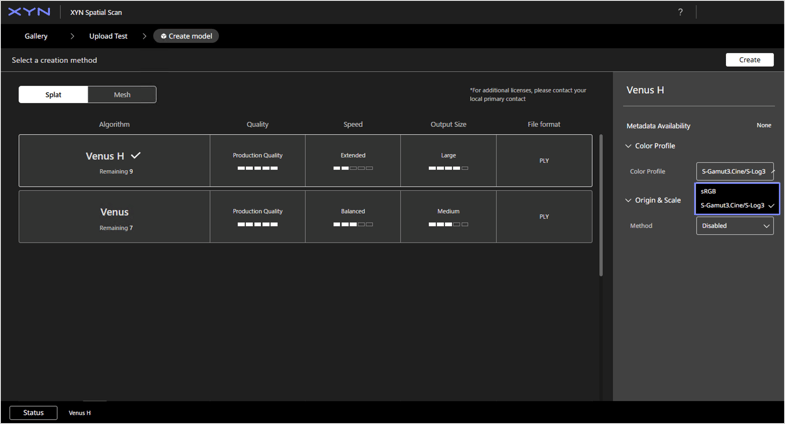
Select color profile of input image when generating models with Venus H
Step 3:Display the Asset in HDR with Unreal Engine
Import the generated 3D asset into Unreal Engine with the XYN Spatial Renderer Plugin installed.
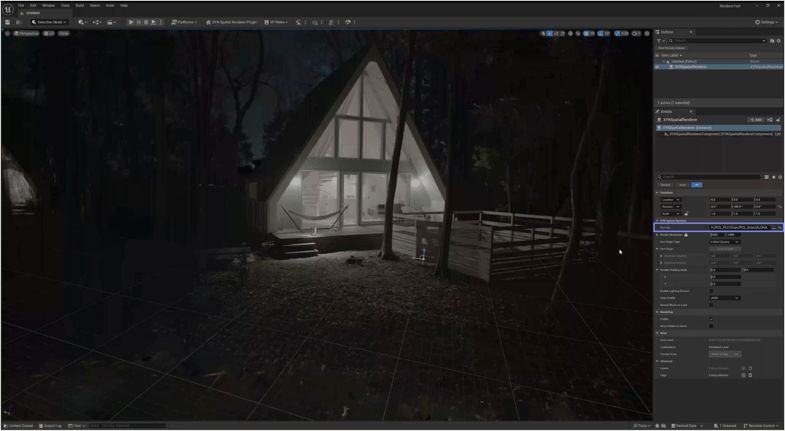
Import PLY file
Set the Color Profile of the XYN Spatial Renderer Plugin to S-Gamut3.Cine / S-Log3, matching the Color Profile used during asset generation. 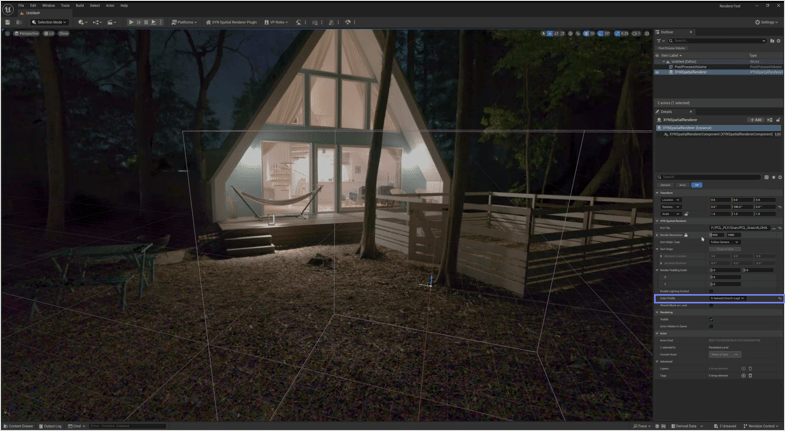
Set Color Profile to “S-Gamut3.Cine / S-Log3”
The XYN Spatial Renderer Plugin correctly interprets the asset's S-Gamut3.Cine / S-Log3 color information and transforms it into the Working Color Space configured in Unreal Engine (such as ACES AP1 / ACEScg) for rendering.
This enables HDR-compatible displays and virtual production LED walls to reproduce the wide dynamic range and color gamut captured during acquisition.
Key Point
To display content in HDR, ensure that the following settings are properly configured for your environment:
- Unreal Engine Working Color Space settings
- OpenColorIO settings
- HDR output settings
- Settings on connected HDR displays or virtual production LED systems
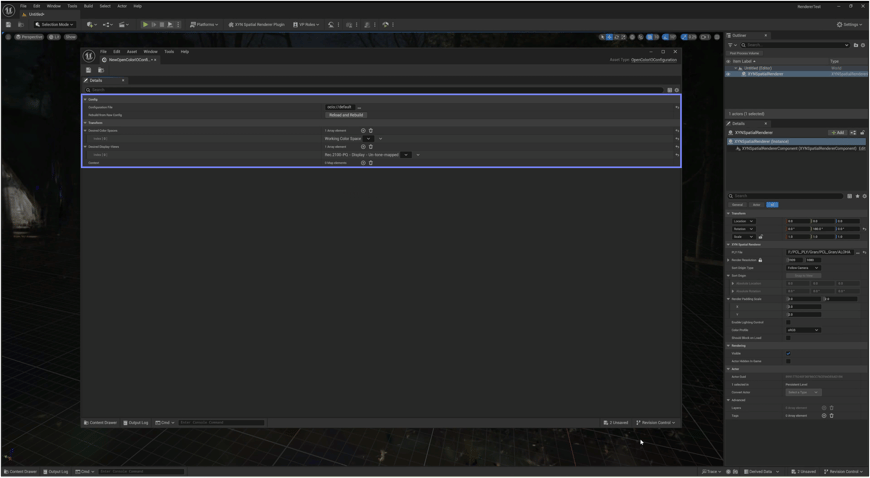
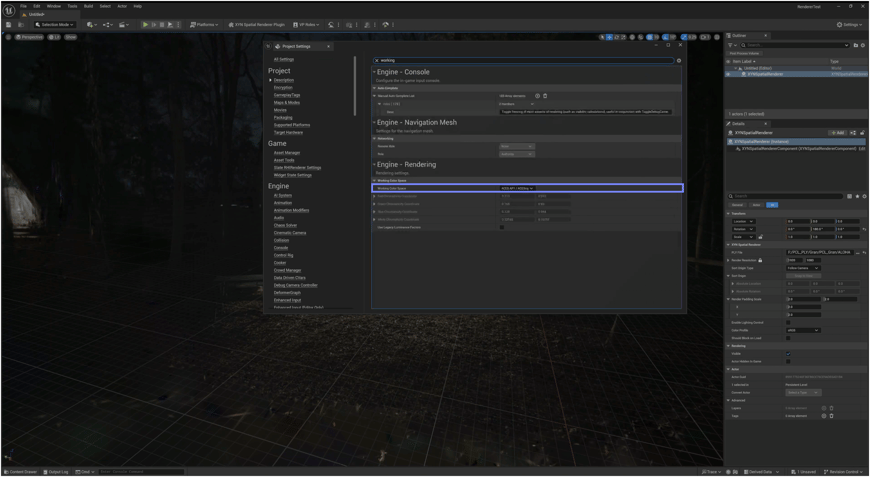
Example Settings for Displaying in Rec.2100 PQ
Working Color Space
“ACES AP1 / ACEScg”
OpenColorIO
OpenColorIO Configuration file:”Default”
Desired Color Spaces:“UE > Working Color Space”
Desired Display-Views: “Rec.2100-PQ - Display > Un-tone-mapped”