


In this article
This guide explains how to capture background assets for Virtual Production using XYN Spatial Scan Navi.
*As of April 2026, this service is available for corporate customers with accounts. Contact us
*The screen images shown here are for illustrative purposes only and are subject to change.
Quick Start Guide
Click here for XYN Spatial Scan Navi setup procedures, and here for basic operations.
VP Mode: Basic Operations & Screen Overview
Refer to the link for setup and basic operations.
Shooting in VP Mode
Basic Operations – Projects
- Create a new project using the button in the bottom right.
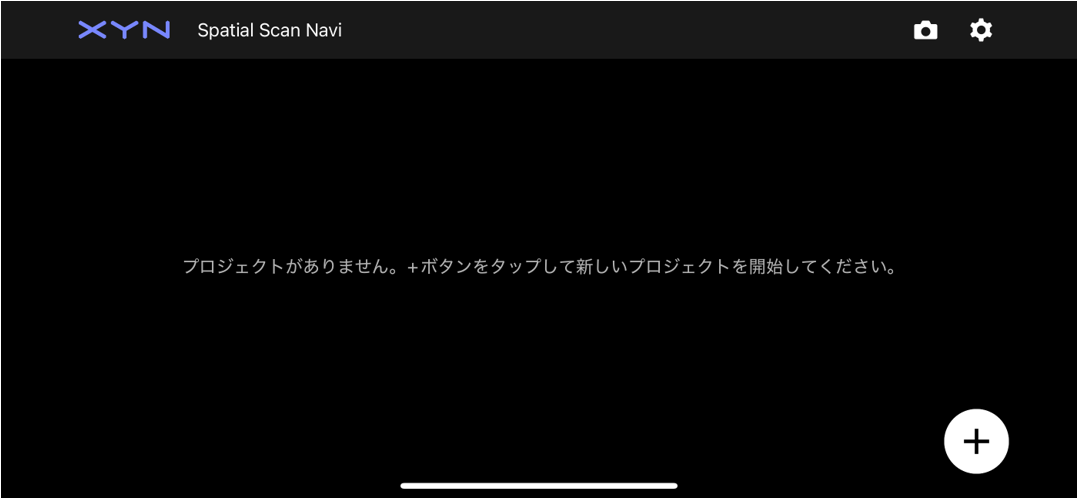
- Select the mode.
・Virtual Production:This is the navigation mode for Virtual Production (VP) shooting.
・Objects *Beta Feature:This is the navigation mode for object photography.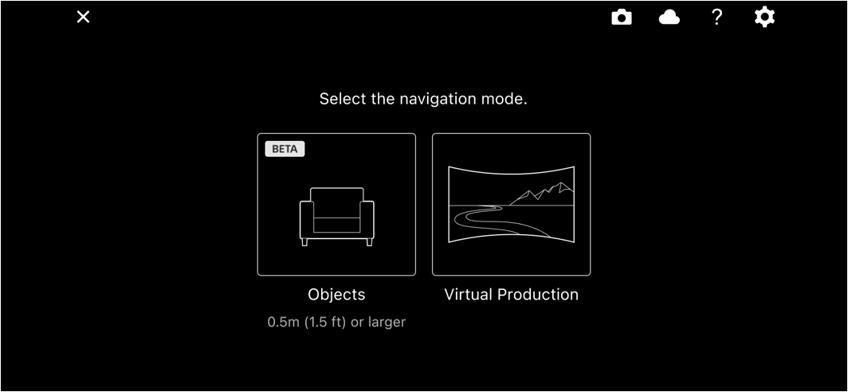
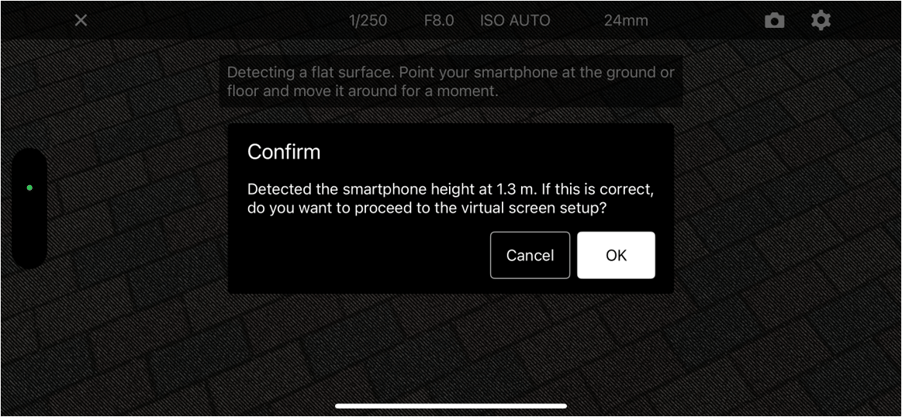
Height Detection
Detects the height of the smartphone from the floor. If the detected height is correct, tap “OK” to continue.
Note: If there is a table or other object nearby, it may be mistakenly recognized as the floor. If an incorrect height is detected, tap “Cancel” and point the screen toward the floor.
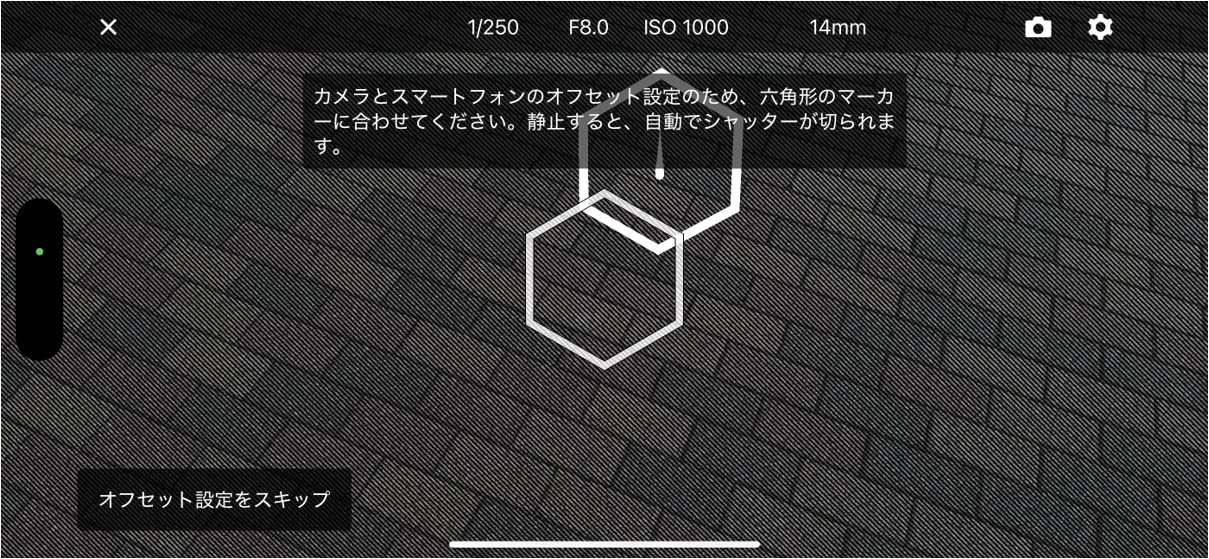
Offset Correction
Capture images to correct the parallax offset between the smartphone and the camera. A single guide hex will be generated. Align the camera hex with it and hold still, and the image will be captured automatically.
Note: Offset correction may fail depending on the subject or environment. Hold the device steady and capture a floor surface with plenty of texture whenever possible. An alert may appear depending on the ISO value that is automatically set based on the lighting conditions. Adjust the shutter speed and F-value appropriately. If the position of the smartphone is changed after correction, the offset correction will no longer be valid and must be performed again.
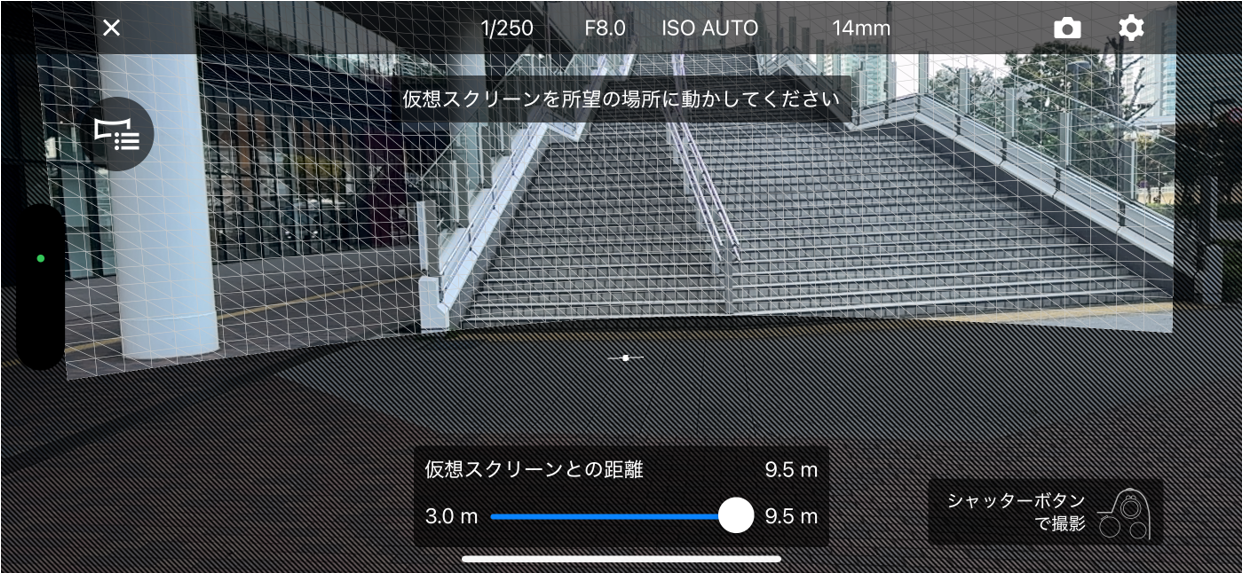
Virtual Screen Placement (Thumbnail Capture)
A virtual screen displayed on the device is used to define the area for 3D generation. Any area contained within the virtual screen will be treated as the target area for 3D generation. To set the target area, point the device toward the object you want to turn into an asset, then adjust your position so that the entire target area fits within the virtual screen. The distance to the virtual screen can be adjusted with a slider, allowing you to place it at an appropriate position based on the size and location of the target area. Once the adjustment is complete, press the shutter button while keeping the target area within the virtual screen. This confirms the position of the virtual screen. The image captured at this point is marked as a reference image and is not used for the 3D generation process.
This image is used as the project thumbnail in Spatial Scan Navi. At the same time, the F-number, shutter speed, ISO, and white balance are automatically set.
Guide Pattern Selection
A guide pattern is generated (the default is Standard). You can select a preset from the icon in the upper-left corner. If you want to change the virtual screen position, tap “Reset Screen” to return to the virtual screen distance setting screen. Tap “Start Shooting” to begin guided shooting.
Automatic Focus Distance Setting
The camera focus distance is automatically set based on the configured guide pattern. You can also skip this step and set it manually using the focus ring. During shooting, you can reapply the automatic setting at any time from the “More menu” on the left side of the screen.
Note: A caution message will appear if the focus distance is changed during shooting. Use the “Focus Settings” button or manually return the focus distance to its original value.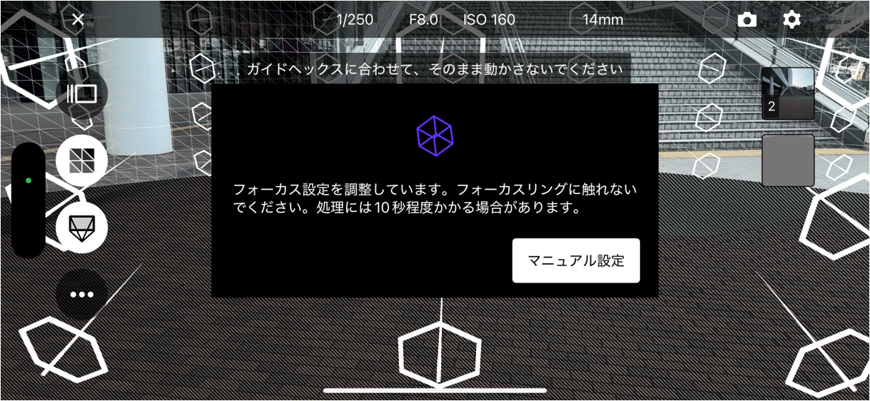
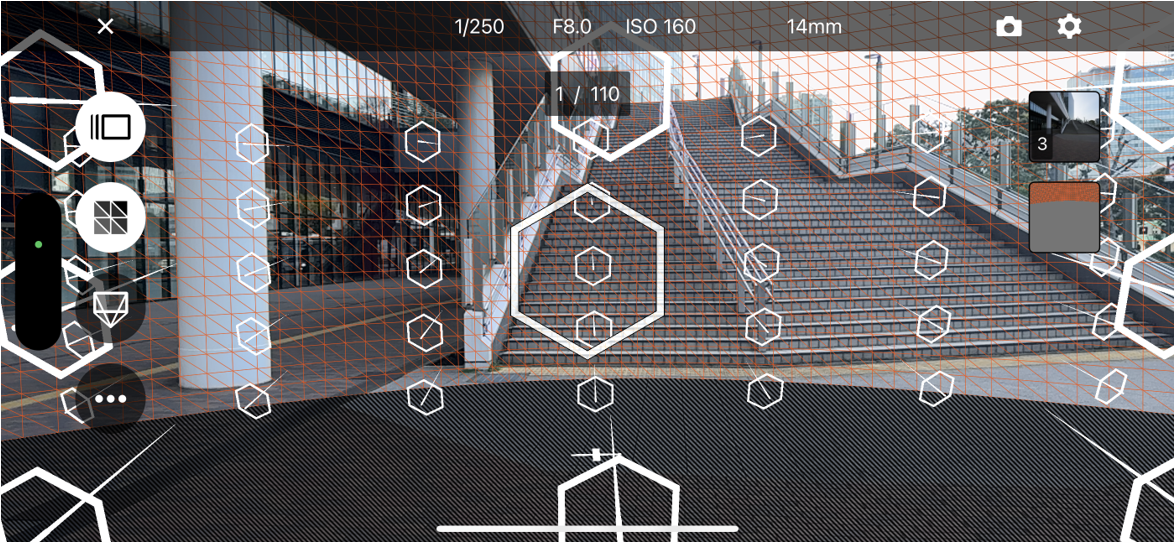
Shooting
Align the camera hex with the guide hex and take the shot. In Auto Shutter mode, the shutter is released automatically when the two hexes are aligned.
- Hold & Shoot
When Hold & Shoot is enabled, the auto-shutter will trigger once stillness is detected. The detection sensitivity varies depending on the shutter speed: a faster shutter speed allows for a more relaxed detection, while a slower shutter speed requires the device to be held more steadily. - Capture Area Heatmap
The virtual screen is color-coded as a heatmap based on the capture area calculated from factors such as shooting positions and the number of shots taken. It can also be viewed in the top-down view.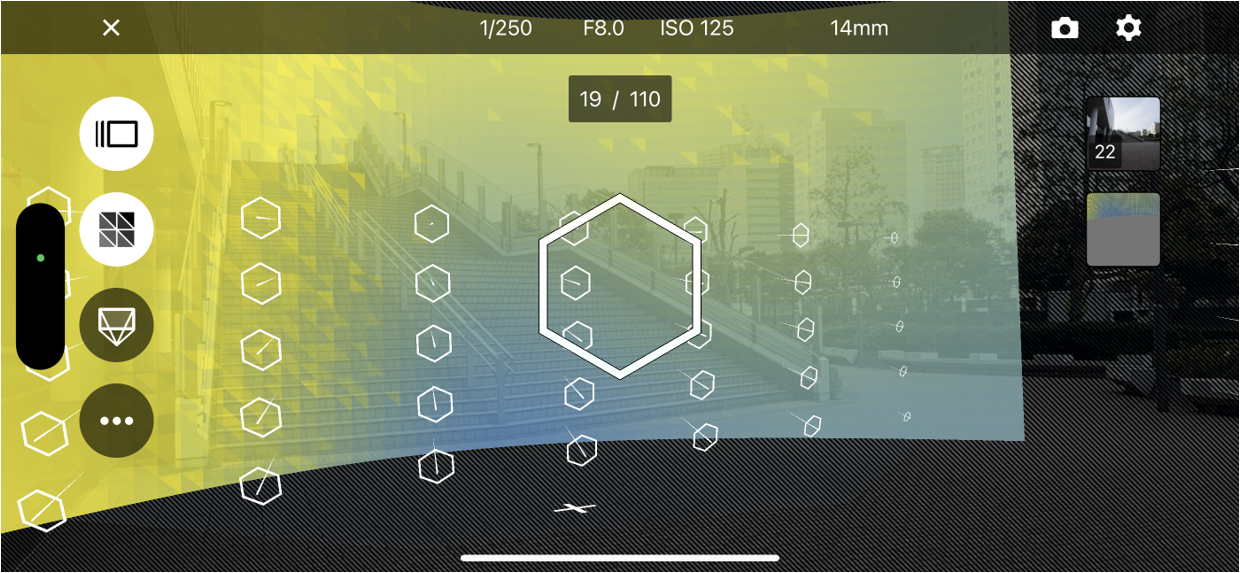
- Capture Viewpoints
Displays the captured camera viewpoints in AR. This can be used to check which camera viewpoints have not been captured sufficiently, and it can also be displayed in the top-down view.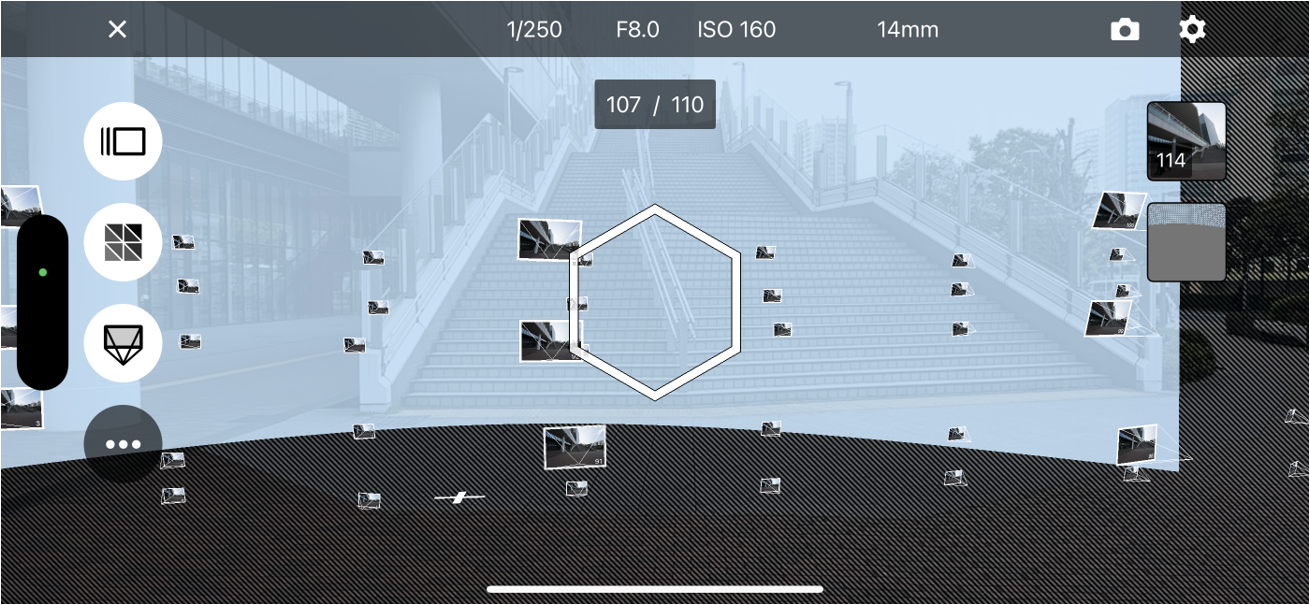
Other Operations in VP Mode
Manual Shooting
Depending on the shooting environment, it may not always be possible to align the camera hex with the guide hex. In such cases, move as close as possible to the corresponding guide hex and release the shutter manually.
Note: Please note that the number of completed guide hexes will not increase.
