









In this article
This article explains how to configure calibration settings when selecting a generation algorithm in XYN Spatial Scan.
*As of April 2026, this service is available for corporate customers with accounts. Contact us
*The screen images shown here are for illustrative purposes only and are subject to change.
Configuring Calibration Settings
You can configure calibration settings when selecting a generation algorithm in XYN Spatial Scan, the application for the XYN Spatial Capture Solution. Calibration allows you to align the scale and coordinate axes of the generated data. There are two methods for configuring these settings.
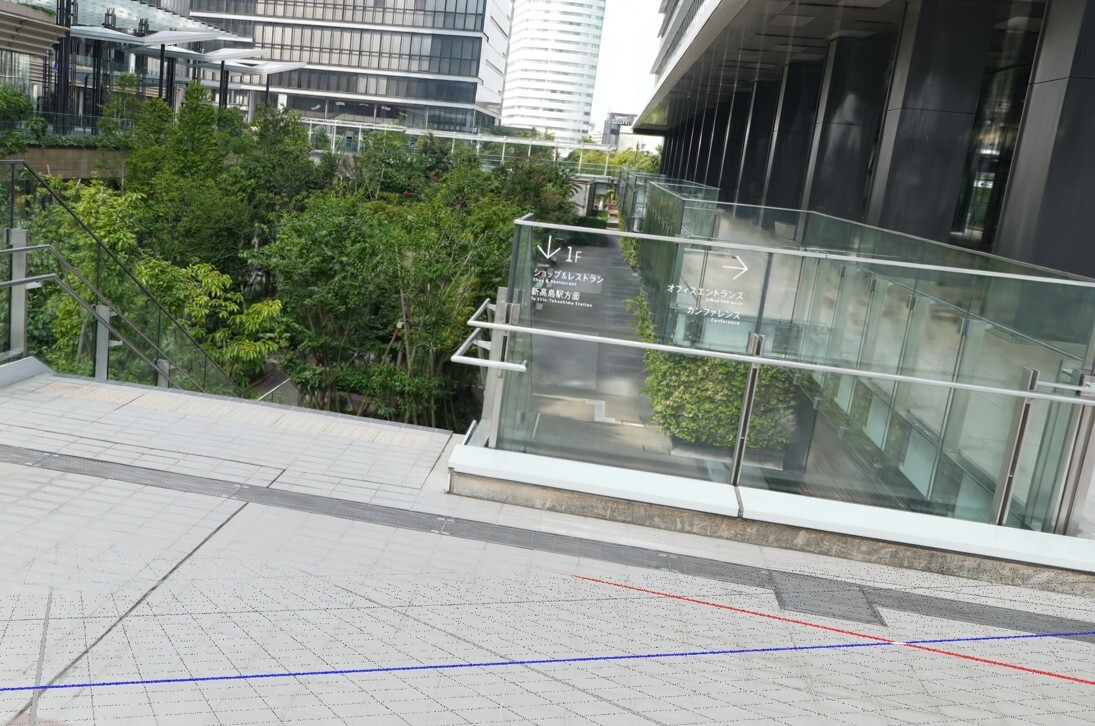
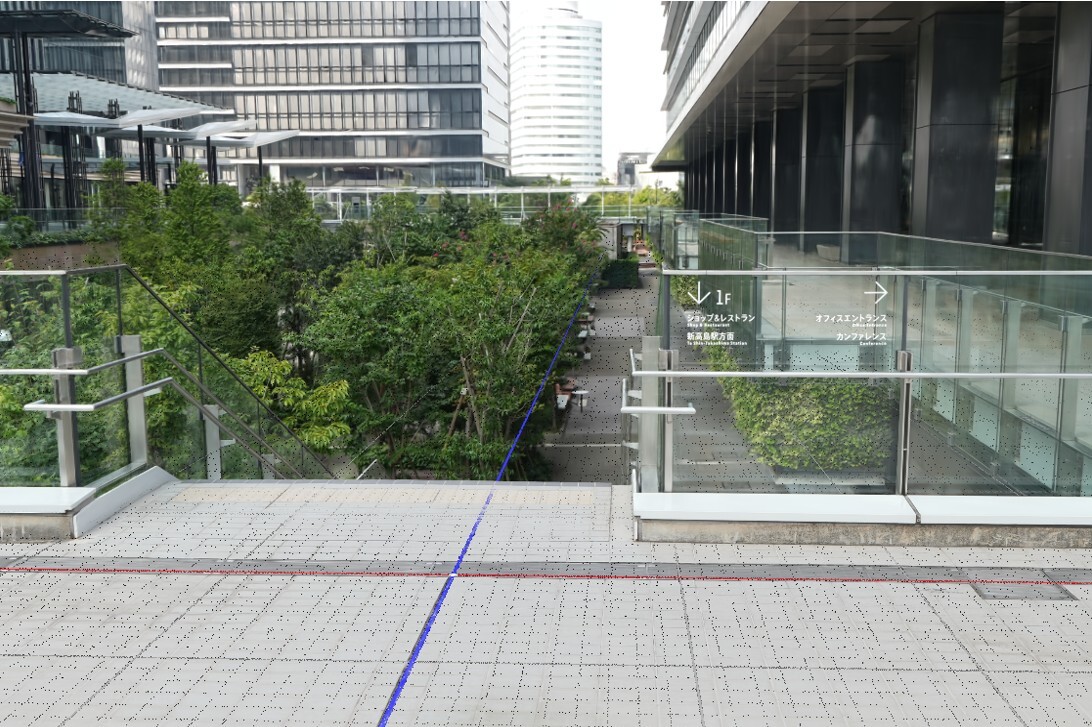
Comparison of no calibration settings (left) and calibration settings (right). With calibration settings applied, the coordinate axes are positioned so that they are correctly horizontal relative to the ground, and the scale and coordinates of the generated data are appropriately corrected.
Using XYN Spatial Scan Navi Metadata
By using XYN Spatial Scan Navi metadata during generation, calibration settings are applied automatically.
Follow these steps to configure this:
-
In the XYN Spatial Scan Navi app, go to [Settings] > [Cloud] > [Enable Upload to XYN Spatial Scan] and turn it on.
-
A project will be automatically created in XYN Spatial Scan, and the images and capture metadata will be automatically uploaded.
-
The [NAVI] icon will appear in the “Use Metadata” section of the generation algorithm settings screen.
-
After confirming that the icon is displayed, start the generation process.
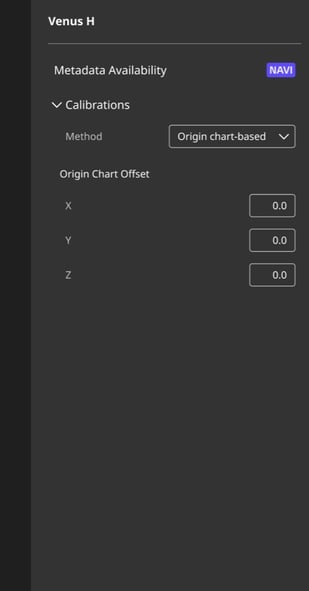
When XYN Spatial Scan Navi metadata is uploaded, the “NAVI” icon appears in the “Metadata Availability” section (example from the Venus H settings screen).
Using reference chart capture data
You can perform calibration settings by capturing an origin chart at the same time as the subject and using that data during generation.
Follow these steps to capture the origin chart:
-
Align the top-left corner of the origin chart with the position you want to set as the origin for the generated data.
-
Take one photo so that both the origin chart and the subject are in the frame. When doing so, adjust the composition so that the origin chart occupies at least 10% of the image (A).
-
After taking one photo, move about 1 meter to the side and take another photo in the same manner (B).
(B).jpg?width=1454&height=472&name=%E5%8E%9F%E7%82%B9%E3%83%81%E3%83%A3%E3%83%BC%E3%83%88%E3%81%AE%E6%92%AE%E5%BD%B1(A)(B).jpg) Examples of origin chart photos. The first photo (A) taken from the initial position, and the second photo (B) taken after moving about 1 m to the side.
Examples of origin chart photos. The first photo (A) taken from the initial position, and the second photo (B) taken after moving about 1 m to the side.
The second photo (B).
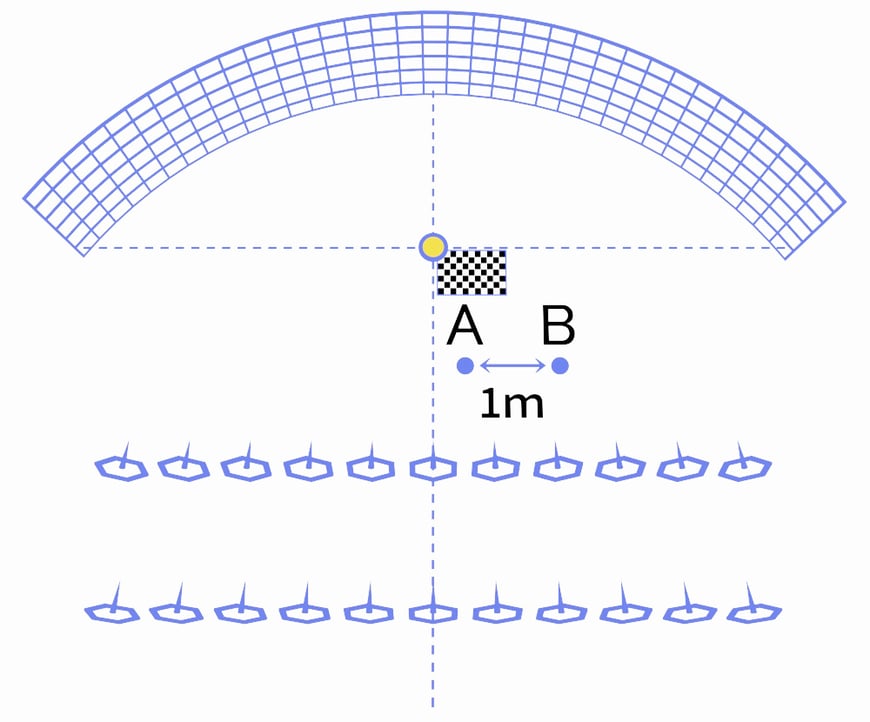
Schematic diagram of the origin chart shooting positions. The distance between shooting positions (A) and (B) is 1 m.
[Note]
-
Please use the origin chart specified by Sony. Please contact us for details regarding the Sony-specified chart.
-
Take the photo from a height of at least 1 m to ensure the origin chart does not appear too skewed.
-
Take the photo so that no markers other than the origin chart are captured in the image.
Follow these steps to set up calibration:
-
Import the image file containing the origin chart into the source.
-
After selecting the generation algorithm, choose [ Origin chart-based ] under [ Method ] in the calibration settings. The image file containing the origin chart will be automatically detected, and calibration will be performed during generation.
-
By default, the origin of the generated data is set to the top-left corner of the origin chart. To change the origin position, configure the origin chart offset settings. Enter the values (in meters) for the direction (axis) you want to move along theX, Y, and Z axes.
-
After configuring the calibration settings, start the generation process.
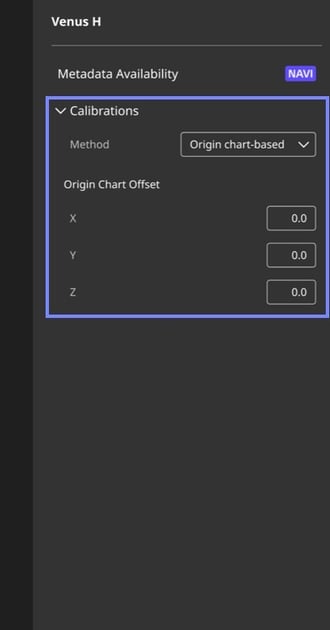
Calibration settings screen ( Venus H ). After selecting [ Origin chart-based ] under [ Method ], enter theX, Y, and Z valuesfor Origin Chart Offset as needed.


