









In this article
Here is how to upload data captured with XYN Spatial Scan Navi (hereinafter, “Navi”) to XYN Spatial Scan.
*As of April 2026, this service is available for corporate customers with accounts. Contact us
*The screen images shown here are for illustrative purposes only and are subject to change.
How to upload data
There are currently three methods for uploading data.
Each method has different characteristics, so please select the one that best suits your needs and situation.
Upload Captured Data Automatically
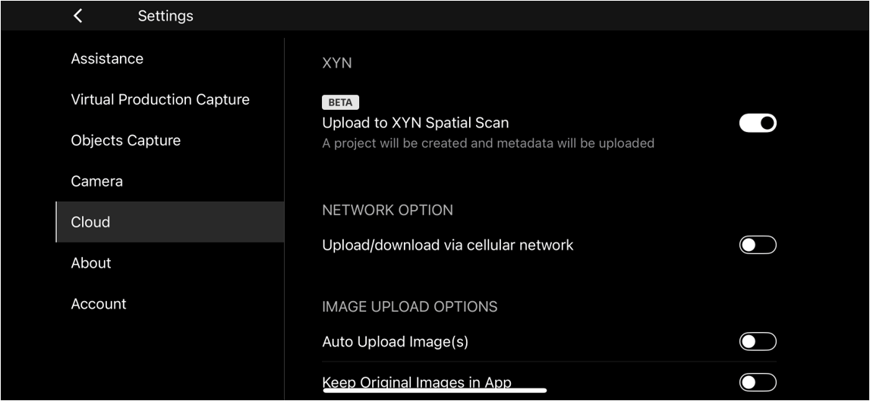
By changing the settings in Navi, you can automatically upload captured data to XYN Spatial Scan.
Open [Settings] in the upper-right corner of the app screen, then go to [Cloud] > [Enable Upload to XYN Spatial Scan] and turn it on.
*As of July 10, 2026, this feature is available as a beta feature.
For detailed setup instructions, see “Automatically Upload Data Captured with Spatial Scan Navi”.
Export Captured Data by Project
Once shooting is complete, you can export all captured data in a project into a single folder.
Connect the α camera to the smartphone running Navi using a USB cable, and set the USB connection mode on the α camera to “Mass Storage (MSC)”.
Then, tap “Export” in the lower-right corner of the Navi project screen.
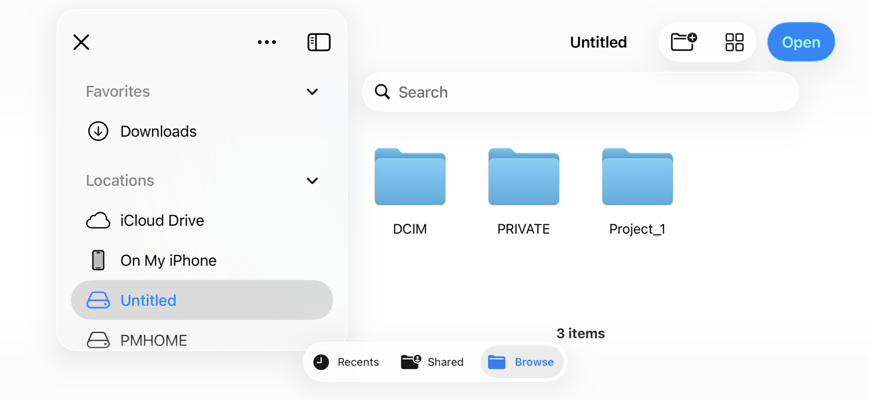
The storage of the connected α camera will be displayed. Select the directory where you want to export the data, and then tap “Open.” All captured data in the project will be collected into a single folder and exported to the selected directory.
In the example shown in the image, the captured data for “Project_1” is exported directly to the root directory of the α camera’s storage.
You can easily upload captured data on a project-by-project basis by uploading all images in the exported folder to XYN Spatial Scan.
Select and Upload Captured Data from the α Camera
You can also select captured images directly from the α camera’s storage and upload them to XYN Spatial Scan.
However, if you create multiple projects during a single shooting session, you will need to manually identify and select the range of consecutive images that corresponds to each project.
If you have captured multiple projects, using method ②, “Export Captured Data by Project,” makes it easier to organize the captured data and upload it smoothly.


