


With the release of SDK ver.2.4.0, developers are now able to set any texture of their choice (CustomTexture) to be displayed to the second screen (Spatial Reality Display2DView), as well as to place buttons or other interactible GUI elements.
In this article, we will introduce how to create a simple application making use of these new features.
Starting Up
Let's start by creating a new Unity Project and by importing the srdisplay-unity-plugin.unitypackage ver.2.4.0.
Delete all objects in the default SampleScene except the Directional Light, and add an SRDisplayManager and an SRDisplayBox to the scene.
Next, add a new 3D Object to the center of the SRDisplayBox and attach the Floating Object script to it.
Finally, create the following AppController script and attach it to a new empty GameObject so that the SR2DView appears right when the app starts.

CustomTexture
First, let's use CustomTexture to display the scene from a different perspective on the second screen.
-
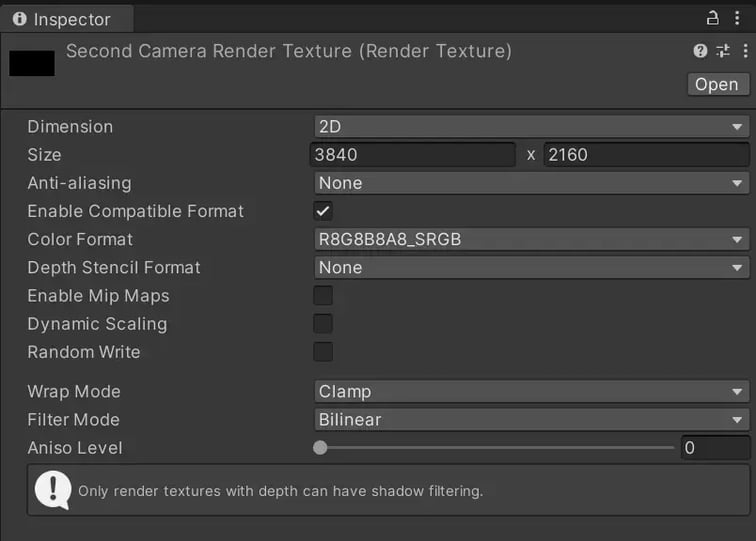
Create a new RenderTexture in the Assets folder.
- Place a new Camera object, SecondCamera, in the scene in the desired location and assign the RenderTexture you just created to its Output Texture.

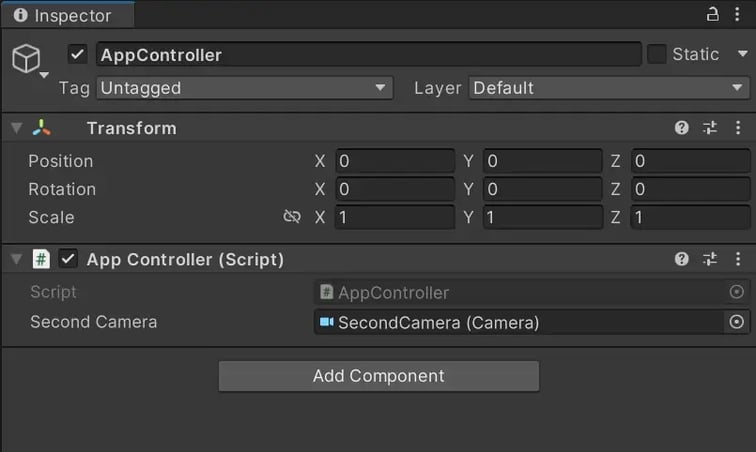
- Make the following changes to AppController.
Prepare a variable for SecondCamera.
Set the SecondCamera's TargetTexture to the SR2DView's CustomTexture at Start().
- In the Inspector, assign the SecondCamera object to the AppController's Second Camera.
Build the app and run the exe. The image of the Second Camera will be displayed on the second screen.

GUI
Next, let's create a button to switch the image displayed on the second screen.
In normal Unity applications, the Canvas feature is used to create a GUI.
Internally, SR2DView also uses a Canvas. When the Init function is called, a Screen Space - Overlay mode Canvas set to display on the second screen is automatically generated. Then an image set to display the current SourceTexture is placed on it so as to fill the whole screen.
To display a button on the second screen, we also need to use a Canvas, but it requires some tweaking.
-
Create a new Screen Space Canvas. The Sort Order must be set to 1 or more so that it appears on top of the Canvas inside
SR2DView. Moreover, since the display on whichSR2DViewis displayed may differ depending on the PC environment, the following script needs to be attached to the Canvas to set the correct Target Display at runtime.
- Add a new Button object to the Canvas.
- Add the following method to the AppController and link it to the Button's OnClick() event.


Build the app again and run the exe.
The "SWITCH CAMERA" button will appear in the bottom left of the second screen. Clicking it will switch between the SRDisplayManager's LeftEye image and SecondCamera image.


